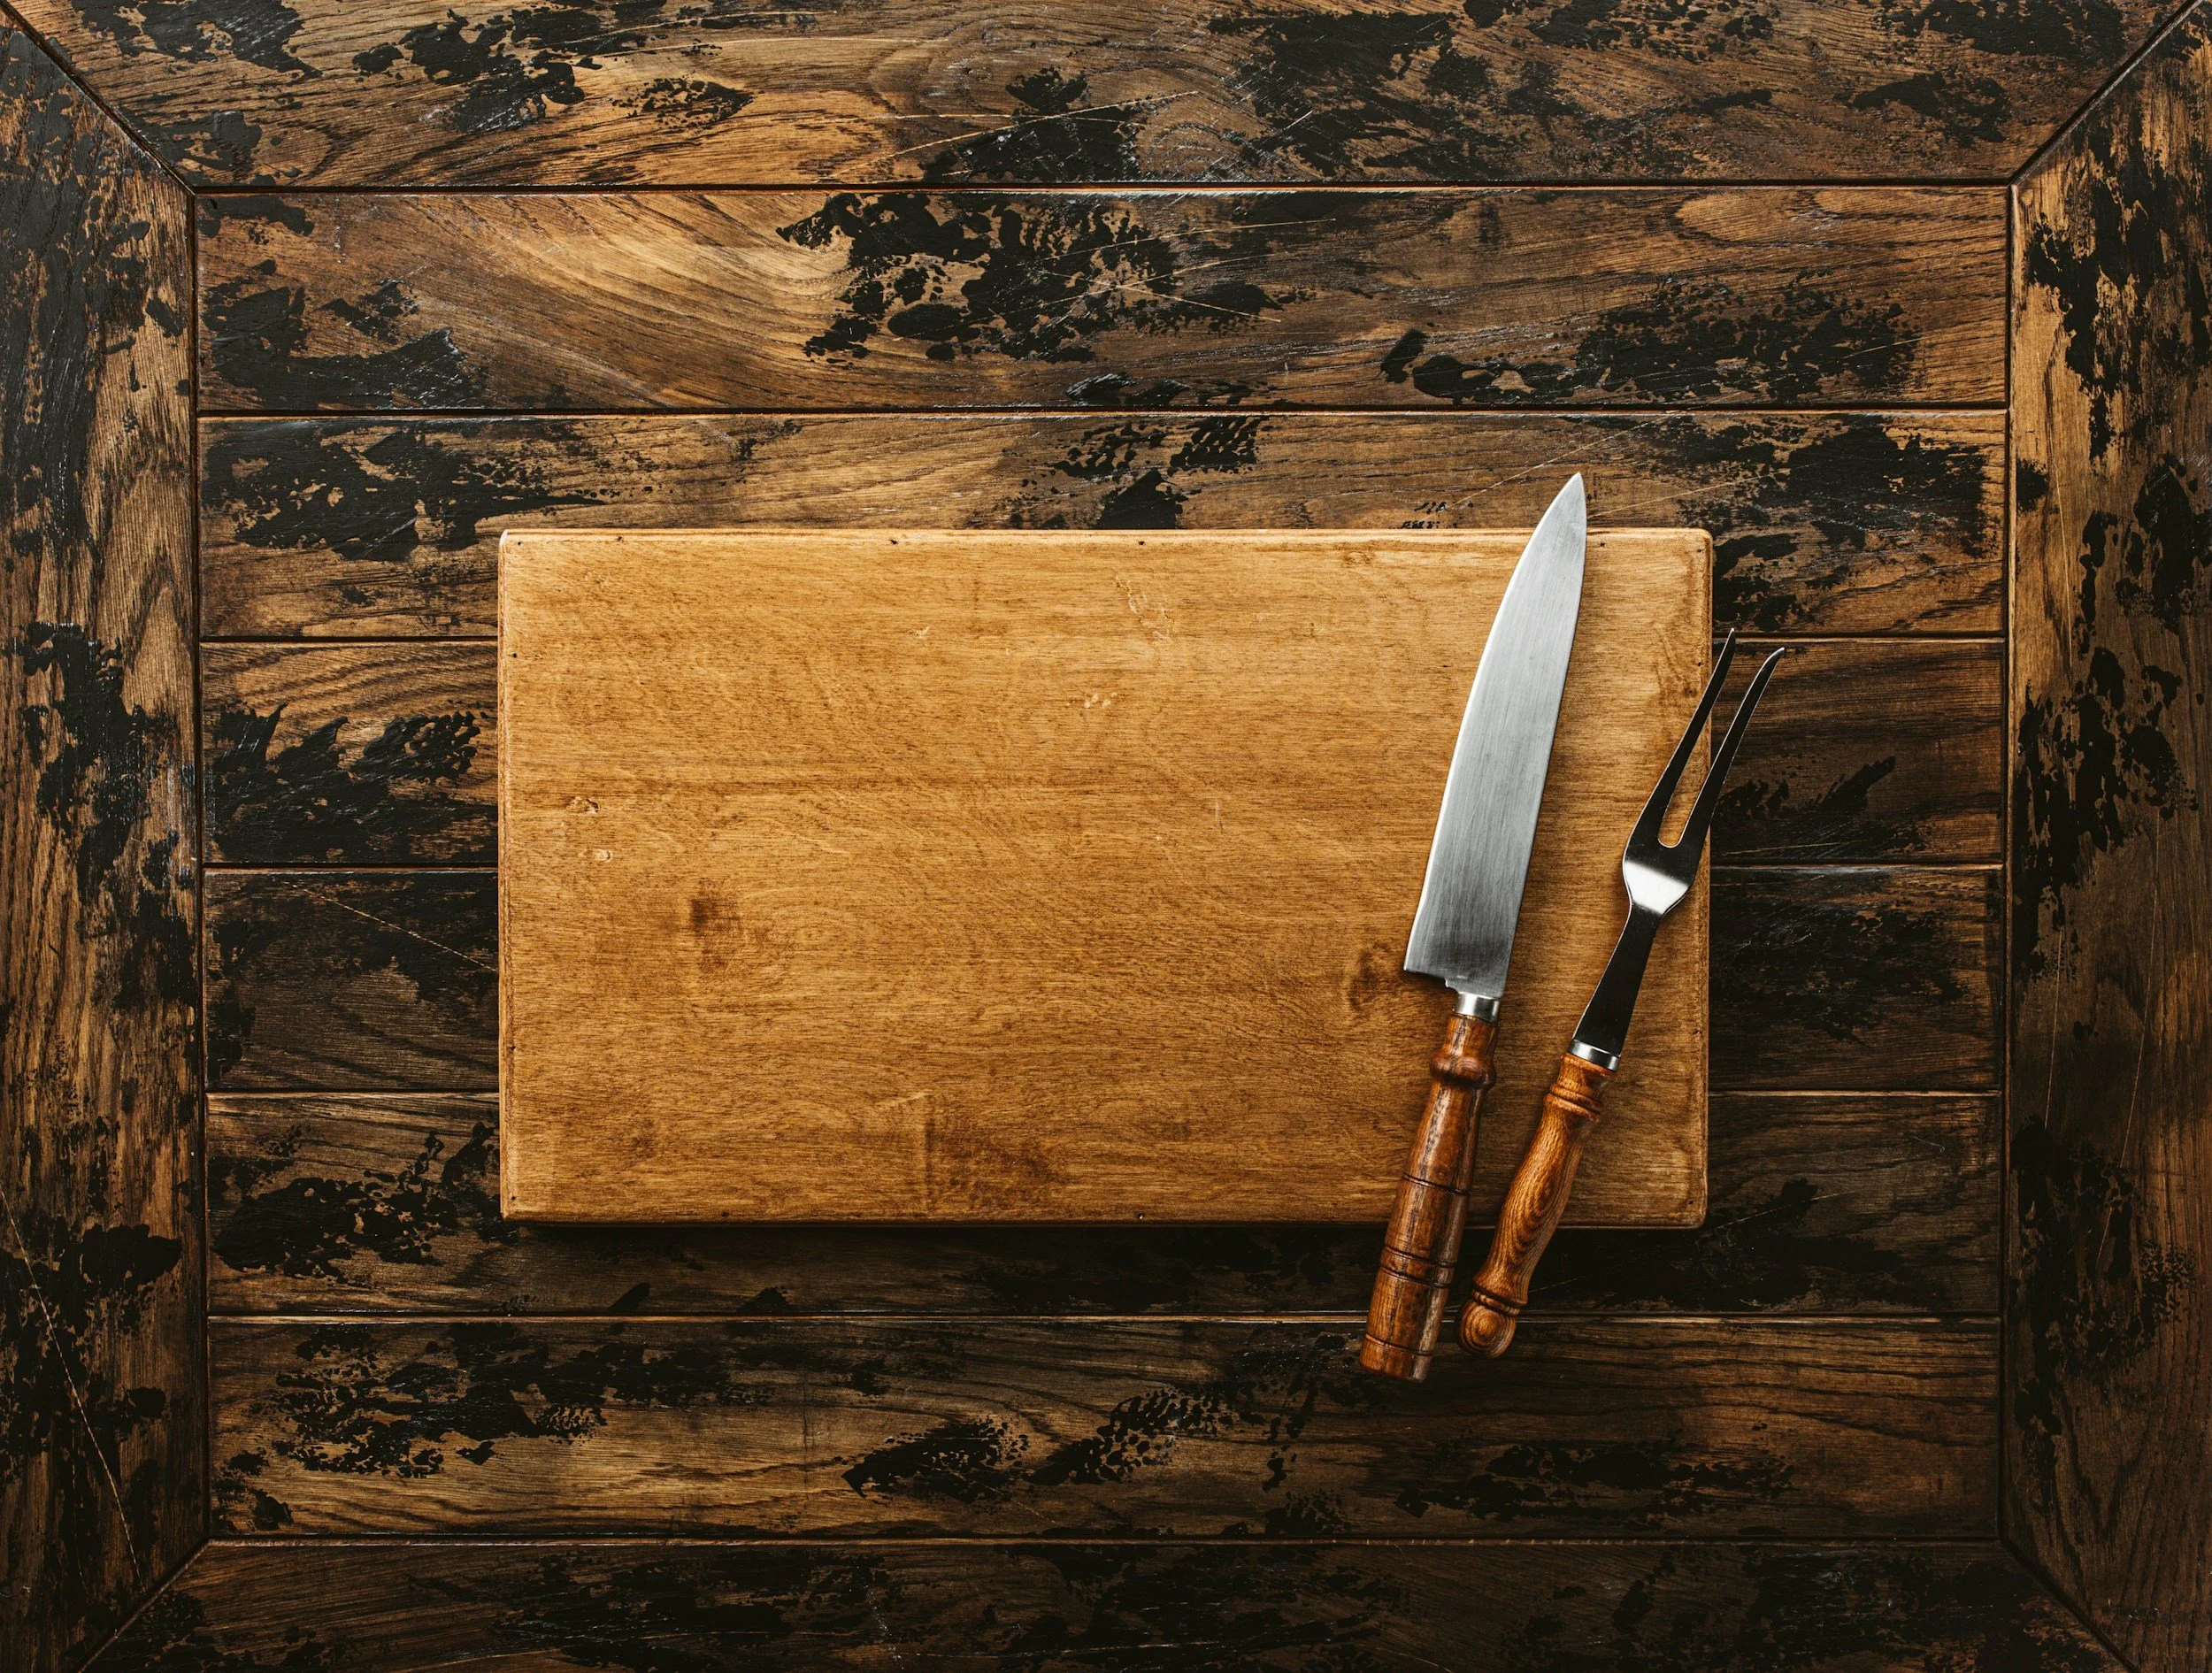
Scroll down for some sneak-peak recipes from our multi-generational family cookbook - the result of decades of trial and error, travel to France, England, Italy, Australia, and the Caribbean, and the combining of the best elements from countless recipes and
experiments to create the perfect dish.
***New Recipes Posted Quarterly***
HOW to cook forest-raised pork the right way.
HOW to cook truly pasture-raised lamb the right way.
Recipes:
Ham & Bean Soup (& Pork Marrow Stock)
Pork Osso Bucco
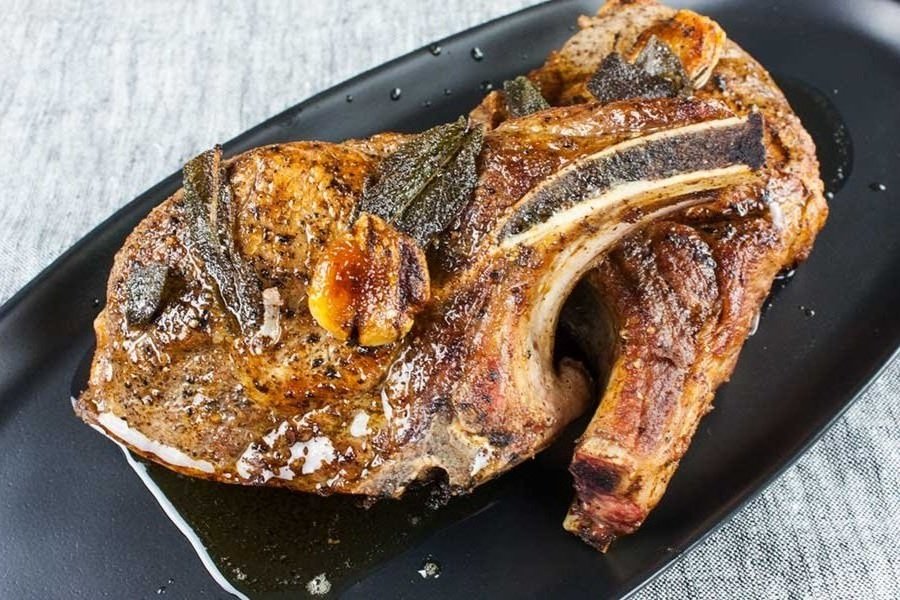
Center-cut Bone-In Pork Chops
Traditional Pulled Pork (from Boston Butt)
Authentic Pork Carnitas Caldos (Soup) (from Boston Butt)
Rum-Glazed Pork Tenderloins
Pork Denver Steaks (“Presa”)
Eggs Jeannette
Baby Spring Lamb (Whole)
Cooking forest-raised pork and
pasture-raised lamb is a little bit different.
Cooking forest-raised pork and pasture-raised and finished lamb is a little different than cooking conventional, confinement-raised pork, and if you're not careful, you might end up overcooking it and losing the incredible depth of flavor and tenderness that comes from raising pigs in a natural environment.
Joel Salatin has pointed out that pastured and forest-raised meats—whether pork or poultry—have a different texture and fat composition than their industrial counterparts. The difference comes down to three main factors: diet, exercise, and fat quality.
HOW to Cook These Meats the Right Way
Lower the Heat – Since the muscle fibers are firmer, cooking too hot and fast can make the meat seize up. Use a lower temperature and longer cook times for roasts, or gentle searing for chops.
Don’t Overcook It – Aim for 135-140°F internal temp, and let it rest before slicing. It WILL continue to cook.
Use the Fat – Unlike commodity pork and lamb, this fat is GOLD. As you cook it melts, coating the meat in umami savoriness. If you want to cut it off, save it and later render it for cooking, crisp it up for added texture, or baste roasts with it.
Pair It with Simple Ingredients – Let the forest flavors shine with fresh savory herbs (like rosemary, marjoram, or sage), lots of butter, garlic, and salt.
WHY is it so different than commodity meats from the grocery store?
1. Diet: The Flavor Factor
Forest-raised pigs eat a diverse diet that includes acorns, nuts, roots, forage, and whatever else they root up in the woods. This diet creates a more complex, rich, and slightly "wild" flavor profile compared to grain-fed pigs. Pasture-Raised Lamb on the other hand dines on our native pastures, rich with over 100 species of grasses, forbes, herbs, and woody species. Depending on what these animals have been eating, you might notice subtle nutty or earthy notes or bright herbal hints in the meat. This means you don’t need to overpower it with heavy seasonings—simple salt, pepper, garlic, and fresh herbs will let the natural flavor shine.
2. Exercise: Firmer but more Tender and Juicier Meat
Unlike factory-farmed animals that barely move, our forest-raised pigs get to roam, root, and move around all day and our sheep are constantly on pasture, grazing, running, and playing. This results in firmer, denser muscle fibers, but when cooked properly, the meat is juicier, not tough. The key is to avoid overcooking—many people assume pork has to be cooked to 160°F, but pastured pork is best at 135-145°F (USDA-safe temp is 145°F with a 3-minute rest. (Many people prefer their pork finished at 130°F - 140°F*, and the same goes for our Lamb. Less Is More.
3. Fat Quality: More Luscious and Renderable
Our naturally raised pork and lamb have higher-quality fat, often softer and more yellow-hued due to a varied diet and higher levels of fat-soluble vitamins. The fat is more delicate and renderable, which makes it ideal for slow cooking or making rich stocks. Unlike conventional meat fats, which often has hard, flavorless gristle due to a corn-heavy diet, fat from our animals melts beautifully and adds a silky, luxurious mouthfeel to dishes.
—
*(CONSUMING RAW OR UNDERCOOKED MEATS MAY INCREASE YOUR RISK OF FOODBORNE ILLNESS, ESPECIALLY IF THOSE MEATS ARE FROM FILTHY FACTORY FARMS INSTEAD OF ETHICAL LOCAL FARMS).
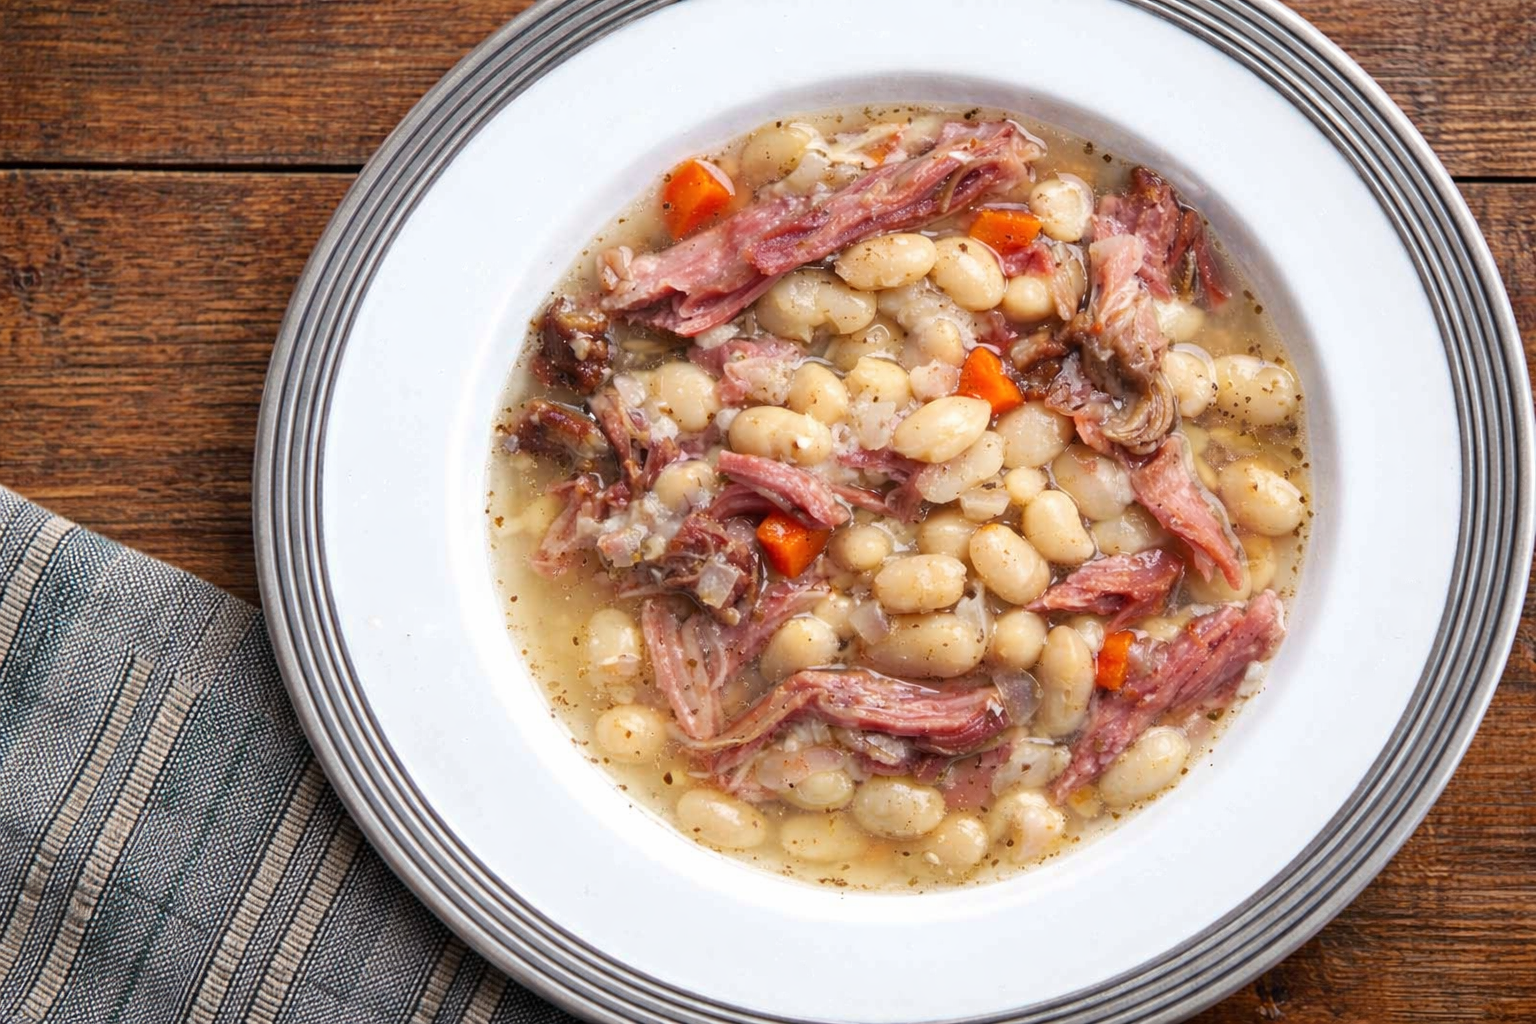
Ham & Bean Soup
A classic winter pot of comfort, ham and bean soup grew out of practical kitchens where nothing was wasted and everything was stretched. Beans simmered low and slow with a smoked ham bone and a good stock become something far greater than their parts… thick, hearty, and quietly luxurious. As it cooks, the broth turns silky and deep, the beans soften into cream, and the whole pot takes on that steady, old-fashioned savor that feels like it has always existed.
Pork marrow bones take it a step further. As the collagen and marrow melt into the stock, the soup gains an exquisite, buttery body and a richer umami backbone… not heavy, just complete. The result is humble food that eats like a feast… the kind of bowl that warms hands, slows conversation, and makes the house smell like you meant to be home tonight.
Ingredients
Meat:
Ham hock or meaty ham bone, 1 (or 2 to 3 cups diced cooked ham) (buy here)
Seasonings:
Bay leaf, 1
Thyme, 1 tsp dried (or 2 sprigs fresh)
Black pepper, to taste
Optional… smoked paprika 1 tsp (helpful if the ham is not very smoky)
Finish… salt to taste, plus 1 to 2 tsp apple cider vinegar or a squeeze of lemon
Vegetables:
4 15oz Cans Navy or Great Northern Beans
Onion, 1 large, diced
Carrot, 2, diced
Celery, 2 ribs, diced
Garlic, 3 cloves, minced
Liquids:
Pork Stock, 8 Cups (ingredients for stock below)
Pork neck bones, 1 to 1.5 lb (buy here)
Cold water, about 10 to 12 cups
Apple cider vinegar, 1 tbsp
Onion, 1 medium, quartered
Carrot, 1 large, cut into chunks
Celery, 1 rib, cut into chunks
Garlic, 2 cloves, smashed
Bay leaf, 5
Black peppercorns, 1 tsp
Salt, none at first, to taste later
To Make The Stock
Step 1: Optional deeper flavor… roast bones at 425°F for 25 to 35 minutes until browned. (Skip for a lighter, cleaner stock.)
Step 2: Put bones in a pot. Add vinegar and cold water to cover by about 2 inches. Let it sit 20 minutes.
Step 3: Add onion, carrot, celery, garlic, bay, peppercorns.
Step 4: Bring just to a bare simmer. As scum rises, skim it for the first 20 minutes.
Step 5: Keep it at the quietest simmer you can manage, uncovered or barely covered, 4 to 6 hours. Add a splash of water if bones start peeking out.
Step 6: Strain through a fine mesh sieve. Cool fast (sink full of ice water helps). Refrigerate.
Step 7: Remove the fat cap if you want a cleaner soup, or keep some for richness. Salt only when you use the stock.
Notes
If you want maximum body… simmer 6 to 8 hours, then reduce a bit at the end.
For a slow cooker… 8 to 12 hours on low. For pressure cooker on low… 120 minutes, natural release.
To Make The Soup
Step 1: In a soup pot, sauté onion, carrot, celery in a little of the stock fat (or olive oil) for 8 to 10 minutes until sweet and soft. Add garlic for 30 seconds.
Step 2: Add pork stock, ham hock or bone, bay, thyme, pepper, and smoked paprika if using. Bring to a simmer.
Step 3: Simmer gently, partially covered, 75 minutes until beans are tender. Stir occasionally. Do not boil. Add a bit of water if it gets too thick before beans are done.
Step 4: Remove ham bone or hock. Shred meat, discard bone and excess fat, return meat to the pot.
Step 5: Mash a cup of beans against the side of the pot to thicken, if you like.
Step 6: Finish with teaspoon of apple cider vinegar or lemon. Then salt to taste (ham varies wildly in saltiness).

Pork Osso Bucco
An iconic Italian dish originating from Milan, Osso Bucco dates back to the 19th century. Traditionally crafted with braised shanks, this dish is celebrated for its tender meat and rich marrow, cooked slowly in a flavorful mix of wine, broth, and aromatics. Today, it remains a beloved comfort food, cherished for its melt-in-your-mouth texture and robust flavors. Pork marrow bone shanks give the dish an exquisit, buttery texture and rich umami flavor.
Ingredients
Meat:
6 cross-cut pork shanks (1 in. thick and 7–10 oz. each), (optional to tie tightly around the equator with twine).
Seasonings:
Kosher salt
Freshly ground black pepper
5 thyme sprigs
3 parsley sprigs plus ⅓ cup finely chopped parsley leaves, divided
2 bay leaves
3 Tbsp. finely grated lemon zest
Vegetables:
2 medium carrots, finely chopped
2 celery stalks, finely chopped
2 large onions, finely chopped
8 garlic cloves, finely chopped
Liquids:
3 cups dry white wine
1 cup veal stock, or beef stock (optional)
Other:
1 cup all-purpose flour
2 Tbsp. vegetable oil
3 Tbsp. unsalted butter
2 Tbsp. tomato paste
Instructions
Step 1: Set the oven rack in the lower third and preheat to 325°F. Pat dry the pork shanks with paper towels, then season with salt and black pepper. Spread the flour on a large, shallow plate. Dredge the shanks in the flour, shaking off any excess, and set aside. In a large, heavy pot over medium-high heat, heat the oil. Once it’s hot and shimmering, add the shanks in batches and cook, turning once, until browned on both sides, about 10 minutes total. Transfer to a clean plate.
Step 2: In the same pot, add the butter, carrots, celery, and onions. Cook, stirring often and scraping up any browned bits, until the vegetables are softened, about 10 minutes. Stir in the tomato paste and cook until slightly thickened, about 2 minutes.
Step 3: Tie together the thyme and parsley sprigs with twine, then add to the pot along with the wine, veal stock (or 1 cup of water), bay leaves, and the reserved veal shanks and any accumulated juices. Bring to a simmer, season with salt and black pepper, and cover.
Step 4: Bake until the meat flakes easily with a fork and is nearly falling off the bone, about 1½ hours. Use a spider skimmer to transfer the shanks to a plate and cover with foil. Discard the herb bundle and bay leaves. Place the pot over medium heat and boil until the liquid is reduced by half, about 20 minutes. Turn off the heat. Return the veal shanks to the pot, spoon the sauce over them, and cover to keep warm.
Step 5: In a small bowl, mix together the chopped parsley, lemon zest, and garlic. Sprinkle half of the parsley mixture over the veal shanks before serving, and pass the remaining mixture on the side.

Ingredients
Meat:
4 thick-cut pork chops, bone-in (1.5”)
Seasonings:
2 teaspoons salt
1 teaspoon black pepper
Liquids:
2 tablespoons olive oil
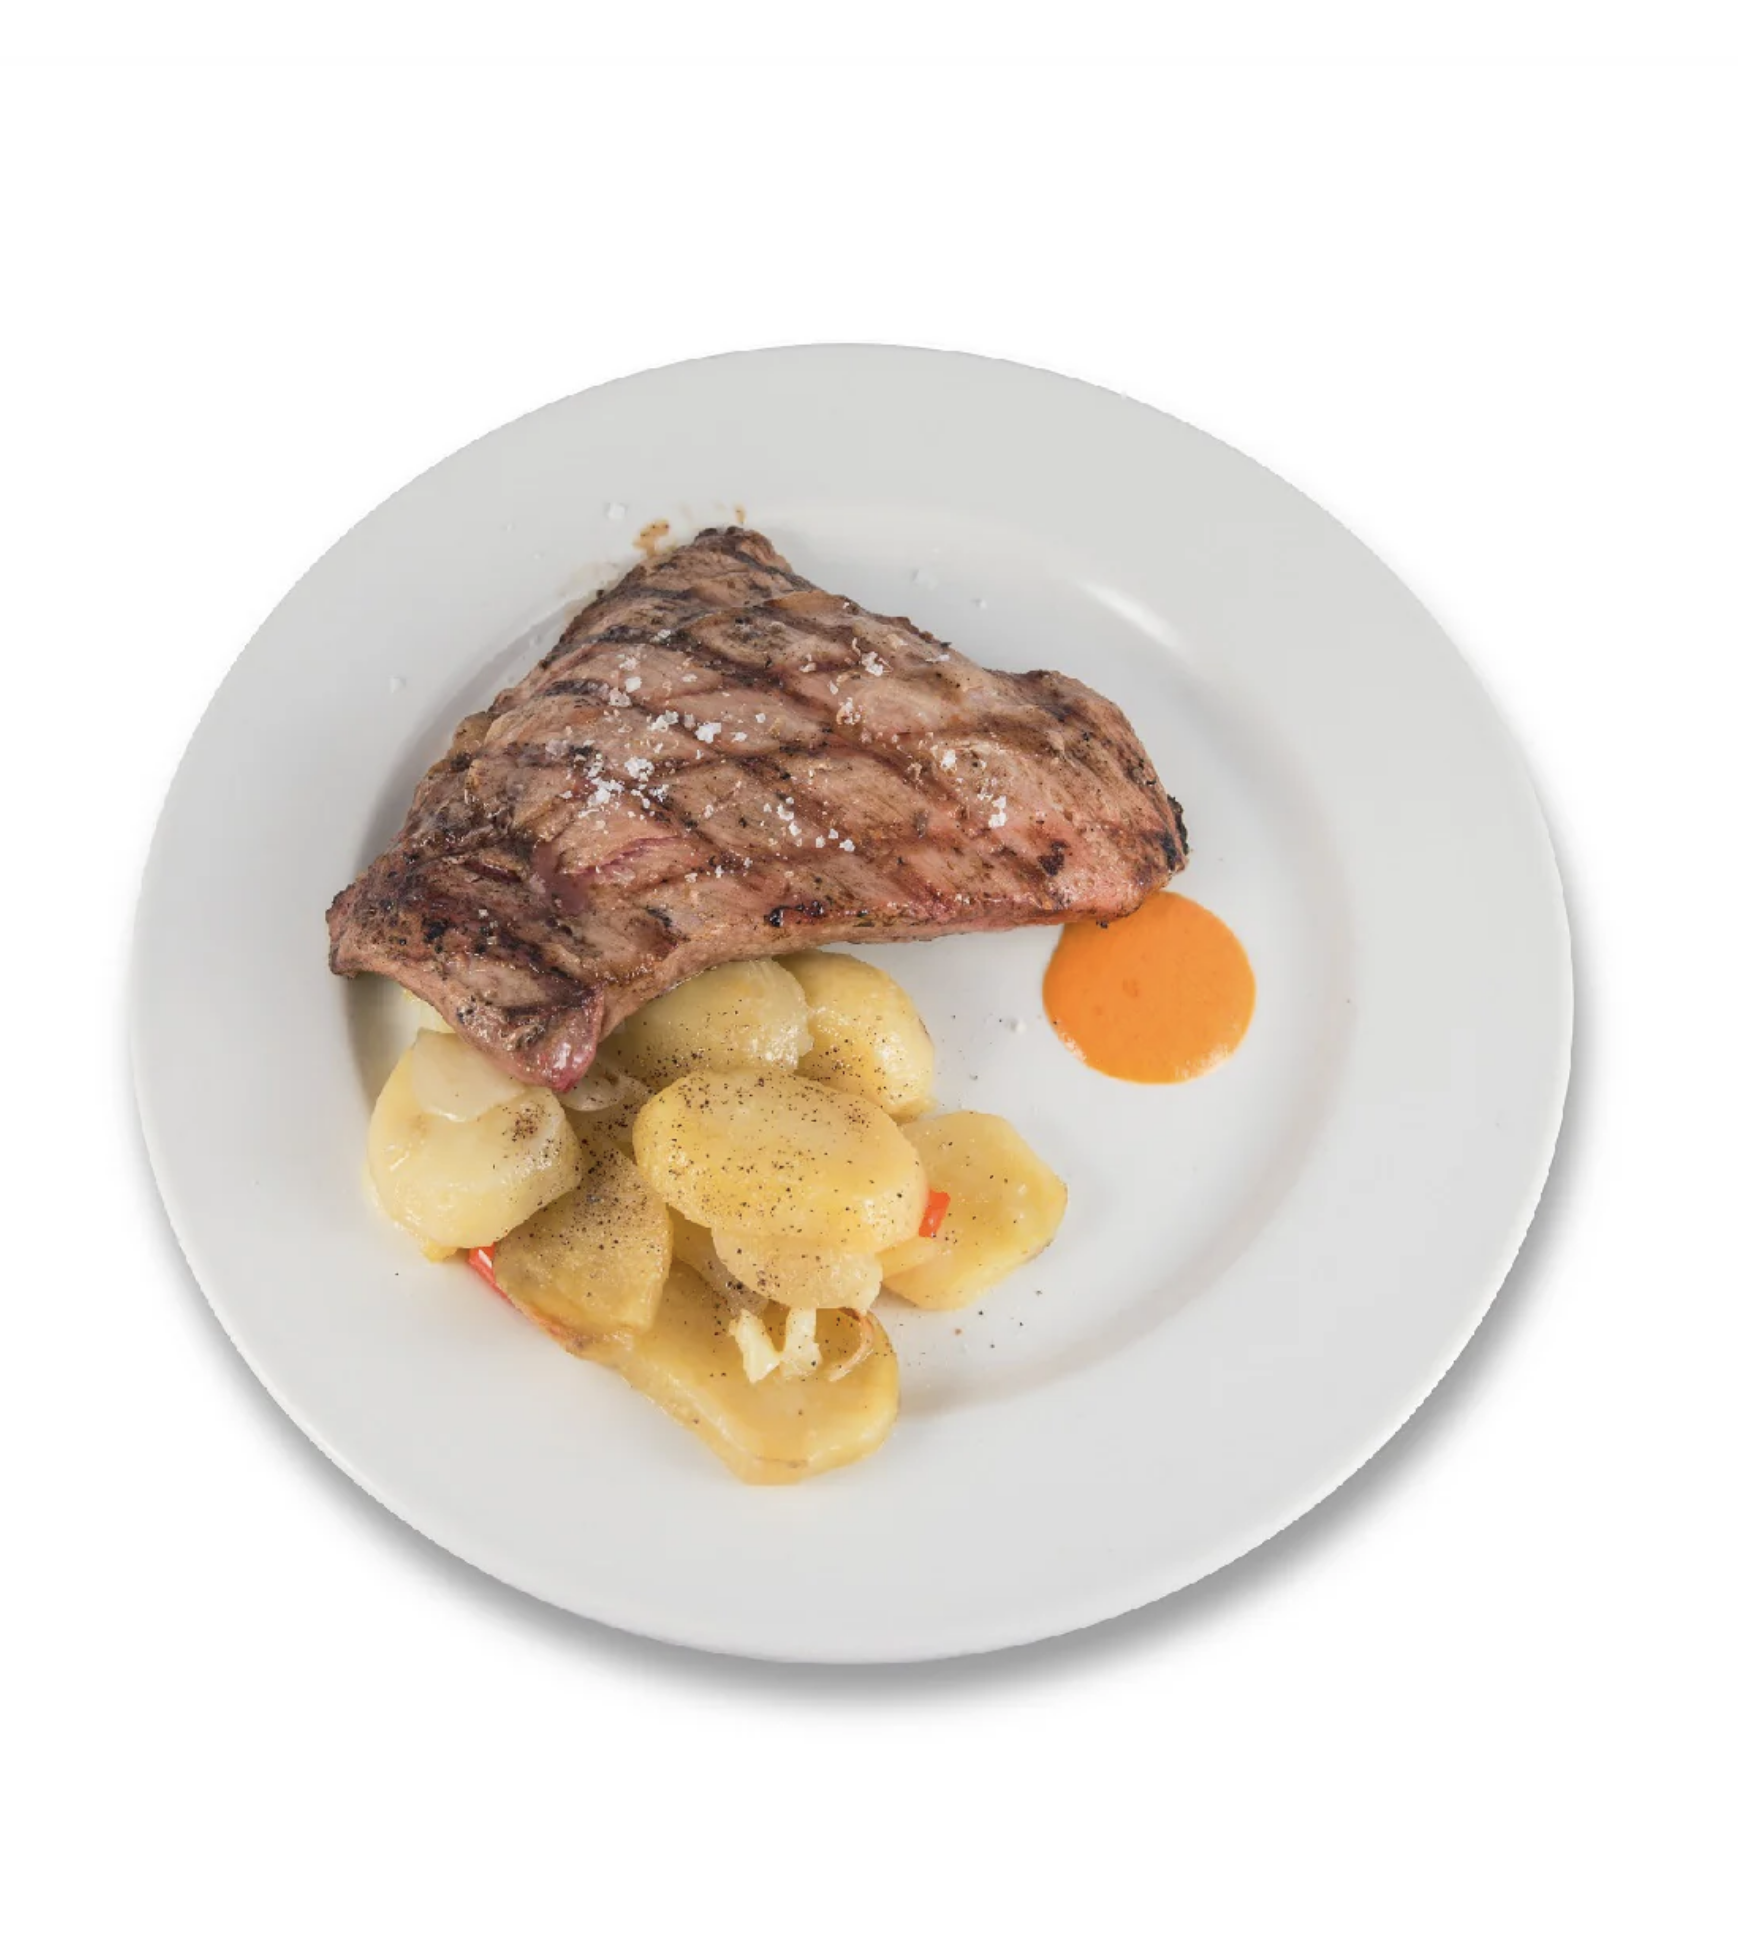
While thinner pork chops give retailers more bang for their buck, thicker pork chops, especially if they are bone-in, bring superior flavor, moisture, texture, and are excellent for grilling or roasting. A bone-in, 1.5” pork chop is a premium delight.
Center Cut Bone-in
Pork Chops
Instructions
Step 1: Rub 4 thick-cut pork chops with 4 tablespoon olive oil. Season all sides generously with 2 teaspoons salt and 1 teaspoon black pepper. Pork needs a heavy amount of salt to bring out the flavor. Salt with a heavy hand when it comes to a thick pork chop.
Step 2: Heat an oven-safe heavy skillet over high heat. Preheat oven to 400 degrees Fahrenheit.
Step 3: Sear the pork chops in the skillet for 2 minutes on each side.
Step 4: Transfer the skillet immediately to the oven and cook until the pork chop reaches an internal temperature of 145 degrees Fahrenheit, about 15 minutes.
Step 5: Let rest 5 to 10 minutes before serving.
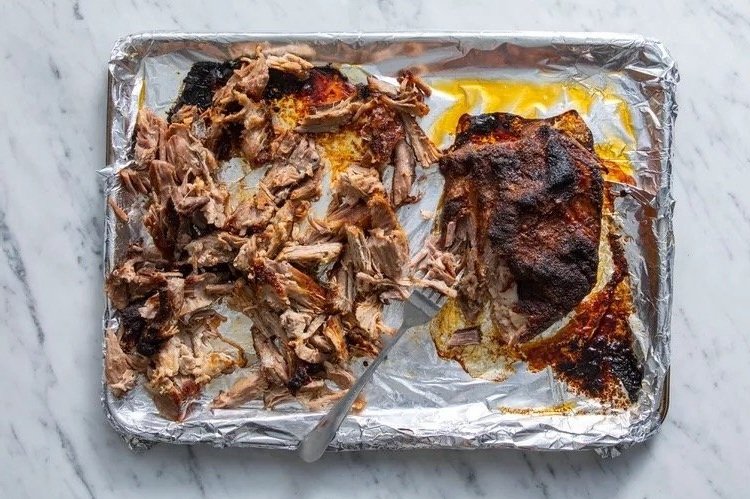
Old School American
Pulled - Pork
Instructions
Step 1: Preheat oven to 350°F.
Step 2: Stir together salt, brown sugar, granulated sugar, paprika, garlic powder, pepper, dry mustard, cumin, and ginger in a medium bowl.
Step 3: Trim 1 (4-5lb) bone-in Boston butt pork roast. Pat dry.
Step 4: Sprinkle meat with seasoning mixture. Let stand at room temperature 30 minutes.
Step 5: Place pork in an aluminum foil-lined (13- x 9-inch) pan. Bake 4 to 4 1/2 hours or until a meat thermometer inserted into the thickest portion registers 195°F. Let stand 15 minutes. Shred pork with 2 forks. *** For an even more tender pulled-pork, set oven (or smoker) to 225°F and roast or smoke 6-8 hours or until a meat thermometer inserted into the thickest portion registers 195°F. Let stand 15 minutes. Shred pork with 2 forks.
Ingredients
Meat:
1 (4- to 5-lb.) bone-in Boston butt pork roast
Seasonings:
4 tsp. seasoned salt
2 tsp. dark brown sugar
1 1/2 tsp. granulated sugar
1 1/2 tsp. paprika
1/4 tsp. garlic powder
1/4 tsp. pepper
1/8 tsp. dry mustard
1/8 tsp. ground cumin
Pinch of ground ginger
Pulled pork is a beloved, all-American barbecue dish with roots in the Southern States dating back to indigenous cooking methods and early colonists. This slow-cooked dish involves smoking or braising pork shoulder slowly until it becomes tender enough to be easily "pulled" into shreds (usually with contrary-forks or a pulled-pork tool). Celebrated for its smoky, flavorful profile and versatility, pulled pork remains a staple at barbecues, gatherings, and comfort food menus across the country.

Pork Kidney and Scallion
Sesame Noodles
Pork kidney with sesame scallion time noodles is a dish rooted in traditional Chinese cuisine, where organ meat is prized for its ultra-rich nutrients and complex flavor. The kidneys are carefully cleaned and stir-fried to a tender, slightly crisp finish, then paired with chewy wheat noodles infused with nutty sesame oil, fragrant scallions, and a hint of spice. This dish embodies the time-honored practice of nose-to-tail eating, celebrating deep, umami flavors while maximizing the use of every part of the animal. It remains a household favorite in our family and a quick and easy go to for a satisfying lunch or easy dinner.
Instructions
Kidney Prep: Slice the kidneys in half horizontally (not top to bottom, but right to left). Place kidneys in mixing bowl with juice of one lemon and 1 teaspoon of salt. Let rest for 10 minutes, stirring several times. Next, slice the kidneys cross wise into small slivers. Set aside.
Cooking:
Step 1: Heat a skillet over medium high heat and add 1 Tbsp sesame oil. When shimmering, add kidney meat and cook for 60 seconds before adding garlic, ginger, and scallion. Cook for 2 more minutes.
Step 2: Next, add noodles and sauce to the same skillet. Toss all ingredients until fully coated by sauce. Let simmer, stirring occasionally until the sauce mostly evaporates and noodles start to turn brown. Transfer everything to a serving bowl. Garnish with chopped peanuts.
Ingredients
General:
1 Package Thai Wheat Noodles (.5lb
1 tsp Ginger, minced
1 Tbsp Sesame Oil
1/4 cup Scallion, chopped
2 pork kidneys (see prep instructions)
for the Noodle Sauce:
2 Tbsp Coconut Aminos or Soy Sauce
3 Tsp Rice Vinegar
1/2 tsp Coconut Sugar
1/2 tsp Salt
(Mix all sauce ingredients in small bowl and set aside)
The Carnias (meat) Ingredients
Meat:
4-5 pound lean boneless pork roast (butt, picnic, etc), excess fat trimmed, cut into 3-inch chunks
Liquids:
1 cup beer (or chicken stock)
Vegetables:
1 medium white onion
diced four cloves garlic peeled and minced
Spices:
one tablespoon chipotle powder (or one chipotle in adobo sauce, minced)
2 teaspoons ground cumin
one teaspoon black pepper
one teaspoon chili powder
1 1/2 teaspoons fine sea salt.
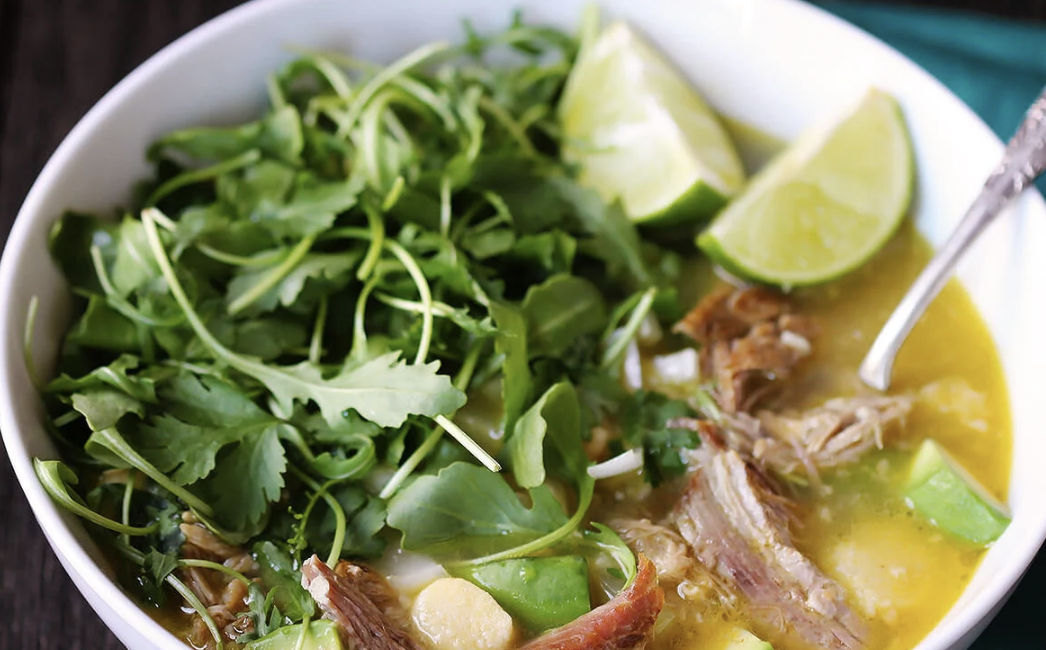
InstructionsAdd all ingredients to a large slow-cooker, and give the mixture a stir to combine. Cook on low for 6-8 hours or on high for 4-5 hours until the pork is completely tender and shreds easily with a fork. Once the pork is cooked, preheat your broiler to high heat and prepare two baking sheets with aluminum foil. Use a fork to shred the meat into bite-sized pieces, and then use a slotted spoon to transfer it to the prepared baking sheets, spreading the pork in an even layer and leaving the juices behind in the slow cooker. (Don’t discard the juices, we’re going to use them later!) Place one sheet under the broiler for about 5 minutes, or until the edges of the pork begin browning and crisping up. Remove the sheet from the oven, then ladle about 1/4 cup of the juices from the slow cooker evenly over the pork, and then give it a good toss with some tongs. Broil for an additional 5 minutes to get the meat more crispy. Then remove and ladle an additional 1/4 cup of broth over the crispy pork. Repeat with the other baking sheet of pork. Serve immediately in tacos, burritos, salads, or whatever sounds good to you! This pork can also be refrigerated in a sealed container for up to 3 days, or frozen in a sealed container for up to 3 months.
Pork Carnitas Soup is a warm and comforting dish rooted in traditional Mexican cuisine. Derived from the flavorful, slow-cooked pork carnitas, this soup blends tender shredded pork with a rich broth, spiced with aromatic herbs and chili peppers and tart lime juice. It captures the essence of authentic Mexican home cooking, offering a hearty and aromatic experience that's perfect for family meals and gatherings - paradoxically suited for both cold winter nights and hot summer days. Undoubtedly, it is one of the finest soups we have ever made, and we live for soup!
Authentic Pork
Carnitas Soup
The Soup - Ingredients
Meat:
5–6 cups cooked pork carnitas
Liquids:
1 Tbsp. olive or vegetable oil
8 cups chicken broth
Vegetables:
1 large white onion, peeled and diced
8 cloves garlic, thinly sliced
1 chayote, skin and core removed, then sliced into matchsticks
1–3 roasted serrano peppers (add to taste, instructions below)
2 avocados, diced
1 cup fresh cilantro, chopped
6–8 cups fresh baby arugula
lime wedges for garnish.
Seasonings:
Salt & Pepper to taste
Instructions
Step 1: Heat oil in a large stockpot over medium high heat. Add the white onion and chayote, and saute for 5 minutes until cooked and the onion is translucent.
Step 2: Add garlic and cook for an additional 1-2 minutes until fragrant. Add the chicken broth, carnitas, and serrano peppers (add one at a time to test out the level of heat) and bring to a boil. Reduce heat to medium-low, cover and simmer for at least 30 minutes.
Step 3: Season generously with salt and pepper. Then ladle the soup into serving bowls, filling them about half full. Then add in a small handful of potato dumplings, avocados and fresh cilantro to each bowl. Then top each with a large handful of baby arugula. Serve with lime wedges for garnish.
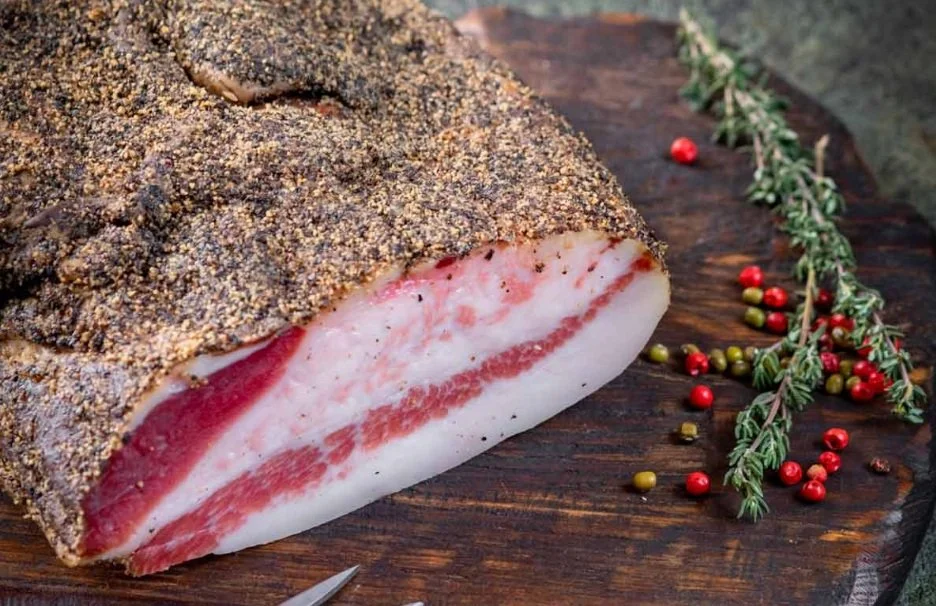
Traditional Italian Guanciale
Guanciale
Guanciale is a traditional Italian cured pork cheek or jowl known for its rich, fatty texture and deep, savory flavor. Unlike pancetta or bacon, it is dry-cured with salt, pepper, and spices, over the course of five days, then air dried for several weeks after which point it is virtually shelf-stable indefinitely. Guanciale is a key ingredient in classic Italian dishes like carbonara, amatriciana, and gricia, where its rendered fat adds a silky, umami-rich depth to sauces. Simply slice off a piece and melt in your pan to sauté or fry your vegetables and meats.
Instructions
Part 1 - Preparation: Using a clean (sterile) knife, trim your fresh pork cheek in such a way as to remove any meat or fat “flaps” or knife nicks - crevices where water or bacteria can build up. Remove any blood, ragged edges or other undesirable parts (including the massater muscle if left on the pork cheek by the butcher). Rinse and pat dry with paper towels. Pour your curing mix into a large bowl. Next place your pork cheek ontop of the curing mix. Using your (clean and sterile) hands, rub the curing mix all over the pork cheek ensuring it covers all areas, including any hidden groves or crevices. When done, place in your chosen curing container.
Step 2 - Curing: Curing containers should be earthenware, glass, or plastic, not metal. Ensure the pork cheek remains off the bottom of the container by covering the bottom with criss crossed forks and spoons or grilling skewers. This gives the water extracted from the pork cheek a place to pool. Allow to cure, covered (with a lid or tin foil) for no less than 5 days. Do not allow the pork cheek to rest in the extracted water or the guancial will become overly salty.
Step 3 - Air Dry Rinse the pork cheek with fresh, tepid water and pat dry with paper towels. Using a steile knife, gently poke a 1” silt into the top (thinest) corner of the pork cheek. With the butcher twine, tie a tight knot through this hole leaving a tail as long as you would like for appropriate hanging length. Hang the guanciale for three weeks before using. After this point, simply slice of a thin piece to melt for sauteeing or frying your meats and vegetables, or add a slice to your broth or stews for added umaimi. There is no need to do anything to the guanciale where pieces are removed as it will air dry and seal over. The guanciale will continue to be good for a prolonged period of time - however that will likely not be a problem as the flavor is so outstanding you will surely be looking to make more soon! Be sure to look on youtube for some visual guidance in making your own guanciale.
Ingredients
For the Curing Mix:
1-2lb “fluffy” salt
1 tablespoon fresh cracked black pepper
1 tablespoon white sugar
1 tablespoon paprika
mix all together well in a large bowl
General:
One whole, fresh pork cheek (Guanciale)
food-grade butcher string
curing tub (any dish will do as long as you can keep the guanciale off of the bottom of the container where extracted water will pol)
refrigerator for the curing process
a well ventilated, rodent and insect free place to hang the guanciale to air dry, temperature does not matter (kitchen, mudroom, cellar, garage, etc)
Cooking Presa, also known as the "money muscle" due to its exceptional marbling and tenderness, requires careful preparation to enhance its rich flavor and texture. Presa is a very versatile cut that can be prepared in many ways and does not need a lot of seasoning to be delicious. If you don't have much time, just sear it in the pan for ONE minute on each side then turn the heat to low and cook an additional 2 minutes, adding a little salt and pepper and you will have a delicacy on your plate. However, the best way to squeeze the flavor out of this cut of meat is to prepare it in the oven and, for that, you need time and patience.
Although the presa is ready to eat in about fifteen minutes, it is possible that when you make a cut, you will find that it is still red and medium rare; this does not please everyone, so you can cut it and finish it in the pan with a drizzle of oil. The best thing to do is to wait and start with plenty of time to prepare the presa pork. BUT be careful not to overcook.
The ideal cooking time for the presa pork, baked in the oven, is one hour and at LOW temperature (150 degrees); this allows the meat to release all its juices and acquire a tender and crispy flavor. You can start with a high temperature, 200 degrees, and after a few minutes, lower the temperature and continue cooking.
You can accompany it with multiple sauces, such as barbecue, Pedro Ximénez, mustard and honey, mushrooms and even cheese.Here's a concise guide:
General Cooking Guidelines :
Bring to Room Temperature: Allow the meat to sit out before cooking to ensure even heat distribution.
Pat Dry: Remove excess moisture with paper towels to promote better browning.
Season: Apply salt at least two hours prior, preferably overnight, to enhance flavor and aid in moisture reduction.
Cooking Methods:
Whole Piece:
Oven or Sous Vide: Cook until the internal temperature reaches 135°F.
Searing: Finish by searing in a hot cast-iron pan with butter, garlic, and herbs until the temperature reaches 145°F.
Butterflied:
High-Heat Cooking: Use a cast-iron skillet at 400°F or grill over hot coals.
Seasoning: For optimal flavor, season the butterflied Presa overnight.
Strips (Zabuton):
Searing: Cook strips in a hot cast-iron pan or over hot coals.
Fat Rendering: Utilize rendered Iberico fat instead of added oil for cooking.
Resting and Serving:
Resting Period: After cooking, let the meat rest for 5 to 20 minutes, depending on thickness, covered with aluminum foil or butcher paper.
Slicing: Always cut against the grain to ensure tenderness.
Simple Accompaniments: Serve with minimalistic sauces like chimichurri to let the meat's natural flavors stand out.
Pork Denver - Presa
an famous, old world delicacy
Ingredients
One or two Pork Denvers (Presa)
Two baking potatoes.
Two spring onions.
One fresh garlic.
Two cloves of garlic.
Extra virgin olive oil.
Salt.
Freshly ground black pepper.
Dried oregano.
A sprig of parsley.
Instructions
Step 1: Peel and chop the garlic cloves into slices. Crush them, and add a pinch of salt.
Step 2: Pour in a teaspoon of dried oregano and mix.
Step 3: Clean the meat, previously left to temper for at least a couple of hours before cooking. To clean, just pull the fatty part of the meat and it will come out easily; otherwise, use a knife.
Step 4: Season the meat with salt and pepper on both sides and spread, with the help of a brush, a little oil and the mixture of garlic and oregano.
Step 5: Let it rest for fifteen minutes. It is advisable to cover.
Step 6: Chop the spring onions into julienne strips and the garlic into slices. Add a little oil in a frying pan and when it is hot, add the garlic and the spring onions. Season with salt and pepper.
Step 7: Cut the potatoes in half and add salt and pepper.
Step 8: Preheat the oven to 200 degrees, with heat up and down.
Step 9: When the oven is ready, place the potatoes on a tray. If desired, drizzle a little oil on top.
Step 10: After 10 minutes, introduce the meat. You can do it in the same tray or in a separate tray. When you place the meat, pour the garlic juice over it.
Step 11: Lower the oven temperature to 180 degrees.
Step 12: The potatoes will be ready in about half an hour, so be careful with the cooking time.
Step 13: The pork presa will be ready in fifteen minutes, but if you want juicy meat, then the best thing is to leave it for at least between 40 and 60 minutes, lowering the temperature of the oven a little more.
Step 14: When you remove the meat and serve it, pour the spring onion mixture and a little chopped fresh parsley on top.
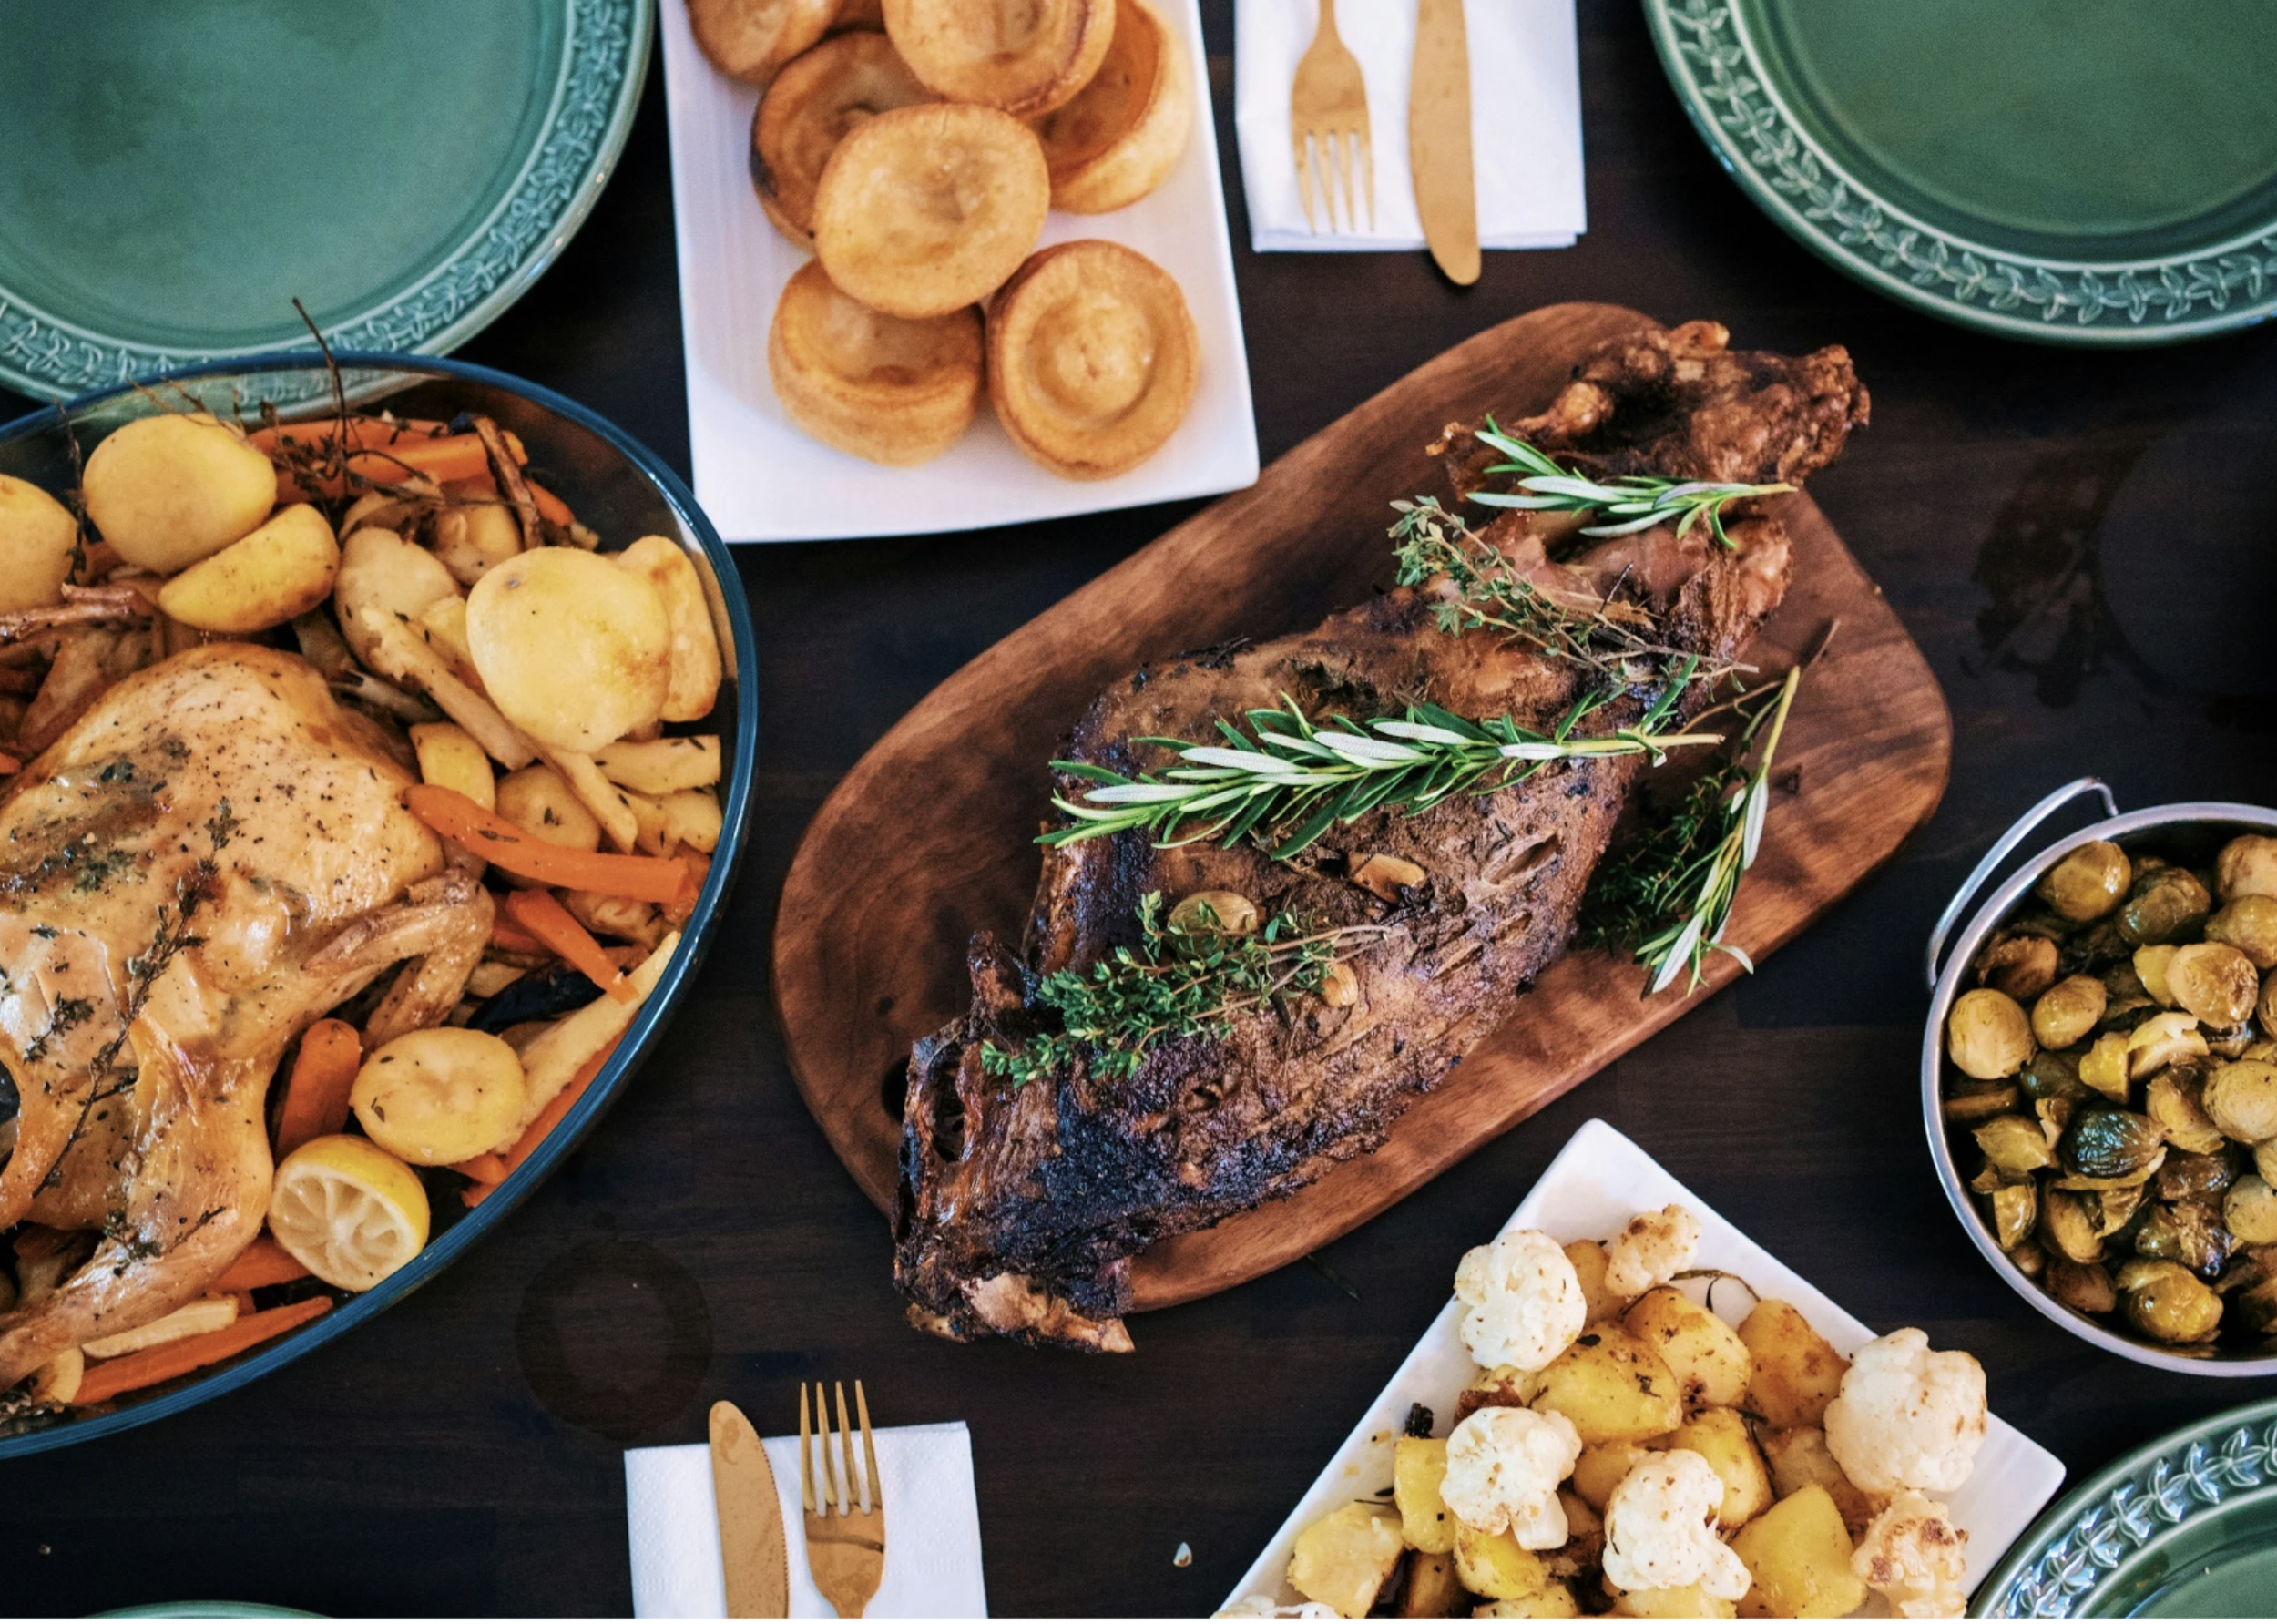
For Italians and Italian-Americans, Easter means one thing on the table above all others: agnello di primavera, the tender baby lamb just after weaning. It is a dish prepared only once a year, a sign of rebirth and renewal, and it carried with it the fragrance of lemon, rosemary, and garlic that perfumed the whole house. The meat was so delicate it hardly needed a knife, and the flavor was mild, almost sweet, unlike the stronger lambs of summer.
Instructions:
Prepare the lamb: Rinse and pat dry the lamb. Rub generously with salt, pepper, and lemon juice.
Season: Insert slivers of garlic and rosemary under the skin and in the cavities. Drizzle with olive oil and massage it into the meat. Sprinkle the grated butter across the top of the lamb.
Roast: Place lamb in a roasting pan with the potatoes and mushrooms scattered around. Add white wine and a few lemon wedges to the pan. Roast at 375°F (190°C) for about 1 hour 45 minutes to 2 hours, basting occasionally with pan juices, until golden and tender (temp test for ideal wellness - we recommend medium rare.)
Rest and serve: Loosely tent with tinfoil and let the lamb rest 20 minutes before carving. Serve with the roasted potatoes, pan juices spooned over, and fresh rosemary sprigs for garnish.
Tradition: In Italy, this dish is served at Easter with seasonal vegetables—artichokes, peas, or asparagus—and plenty of crusty bread to mop up the juices. It’s a recipe that honors both the season and the animal, carrying forward a centuries-old custom of celebrating new life with simple, fragrant ingredients.
Baby Spring Lamb
Agnello di Primavera
Ingredients
Serves 6–8:
1 baby spring lamb (about 40 lbs live weight, ~20 lbs dressed, whole or halved)
8-10 cloves garlic, peeled and lightly crushed
2 lemons (juice of one, wedges of the other)
6–8 sprigs fresh rosemary
½ cup extra-virgin olive oil
½ cup dry white wine
Sea salt and freshly ground black pepper
2 lbs small potatoes, scrubbed and halved
2 lbs forest mushrooms, max 3” pieces
1 stick of semi-frozen butter (grated)
